Favorite Snacks. I have a few. Yes I do have a few favorites when it comes to snacks. But only in moderation. I love chocolate and Potato chips. But on the chips, Salt and Vinegar. Chocolate I try to stay with dark chocolate. But a Hershey bar with almonds is to die for
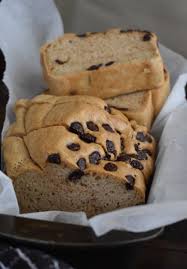
German Christmas stollen. “Dresden is famous for her stollen—long loaves of sweetened bread with raisins and almonds galore; the rolled-up shape is supposed to represent the Holy Infant in its swaddling clothes,” notes a 1915 issue of Table Talk magazine (“the American authority upon culinary topics and fashions of the table”).
Slowly add in milk and continue to beat until smooth. Place dough in a large, clean bowl, cover with plastic wrap and leave to rise in a warm place for approx. 1 h.
Preheat oven to 180°C/355°F. Set aside approx. one quarter of the dough. Combine remaining dough with almond slivers, candied orange and lemon peel, and raisins. Continue to knead until well combined.
Place fruit dough onto the lower third of the oval and roll up. Tuck in overlapping sides. Transfer to a lined baking tray seam side down. Bake in a preheated oven at 180°C/355°F for approx. 40 min. until golden. Leave to cool for approx. 10 min. Before serving, brush with melted butter and sprinkle with confectioners’ sugar.
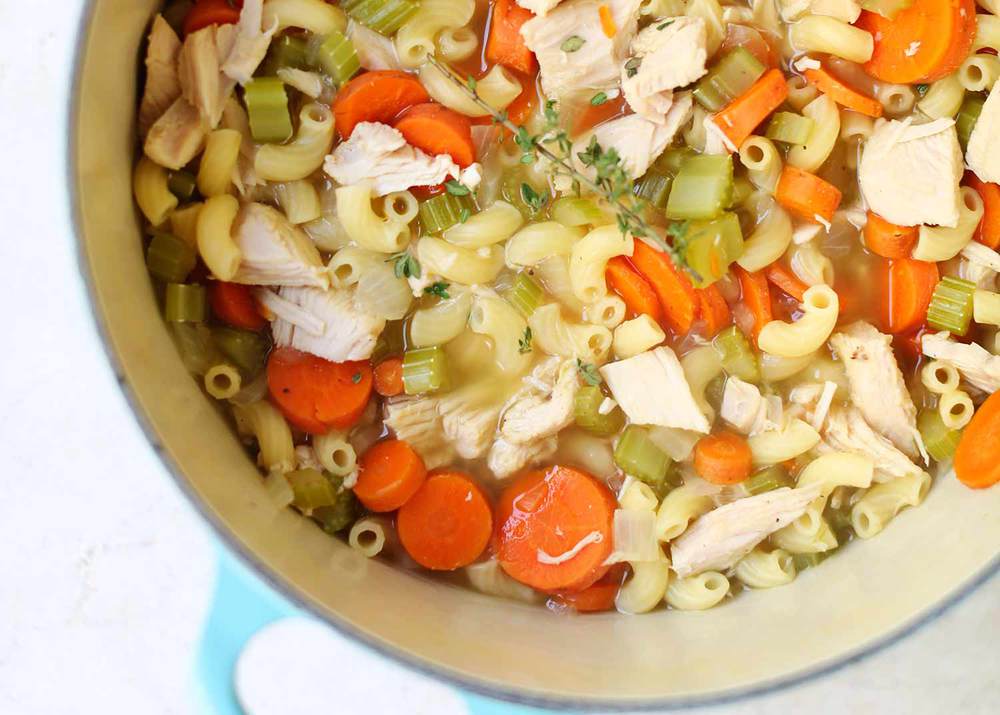
Still have left over Turkey? Turkey Soup. If like our family, you can only eat so many Turkey sandwiches. But a Turkey soup? Now that’s something. Trust me and use the chicken broth instead of Turkey stock. I have to go now, I need to shovel some snow then sit down and have a bowl of Turkey Soup.
The perfect meal to use up all that leftover turkey from the holidays! Packed with fresh veggies, herbs and noodles, this leftover turkey soup recipe is super filling and comforting!
Melt the butter in a large pot over medium-heat. Add the carrots, celery and onion. Cook for 2-3 minutes, or until onions are soft.
Add the water and chicken broth to the pot. Bring to a boil and cook for about 10minutes.
Next add the noodles, turkey, thyme, salt, pepper and garlic powder and bring to a boil. Cook for an additional 10-12 minutes or until the noodles are cooked.
Season with salt and pepper to taste. Every turkey is seasoned differently, so add salt accordingly. Ladle into bowls and serve warm.
Notes
You can also use leftover chicken for this recipe too. Tastes just as yummy!
This soup will keep in the refrigerator for about 3 to 4 days if stored in an airtight container.
To freeze: Make the recipe without the noodles and store in an airtight container in the freezer. When ready to eat, thaw in the refrigerator over night. Cook the noodles in a separate pot while you warm the soup. Once noodles are cooked, add to soup and enjoy.
Chef George Duran is an author, entertainer, and host. He’s also a realist when it comes to eating meals with his children. “I’m always aiming at eating every night together, but with two boys there are days that just doesn’t happen,” says Duran, who was once host of TLC’s Ultimate Cake Off and The Food Networks Ham on the Street.
Still, dinner is a sacred — if frantic— ritual in the Duran household. “I cook dinner every single night…and it’s sometimes a challenge to find something that everyone likes,” he says. “Yes, sometimes I feel like a short-order-cook, but the challenge is to find the same meals that we all enjoy together.”
George Duran’s Muffin Pan Huevos Rancheros Recipe
Ingredients
Non-stick spray
3 small flour tortillas, cut in half
6 tablespoons of canned refried beans
1/2 Cup Fresh Cravings Chunky or Restaurant Style salsa (or similar salsa), plus more for serving
6 eggs
6 tablespoons of grated cheese of choice
Chopped cilantro for garnish
Directions
Preheat your oven to 400F.
Spray a muffin tin with non-stick spray and form each halved tortilla into a cone and press hard into each muffin mold until it forms into a “cup”
Divide refried beans and about 1 tablespoon of salsa into each tortilla cup, evenly, then crack one egg into each
Add 1 tablespoon grated cheese on top of eggs and bake in oven for 13 – 15 minutes
Remove from oven and allow to rest for a couple of minutes before removing each cup and topping with more salsa
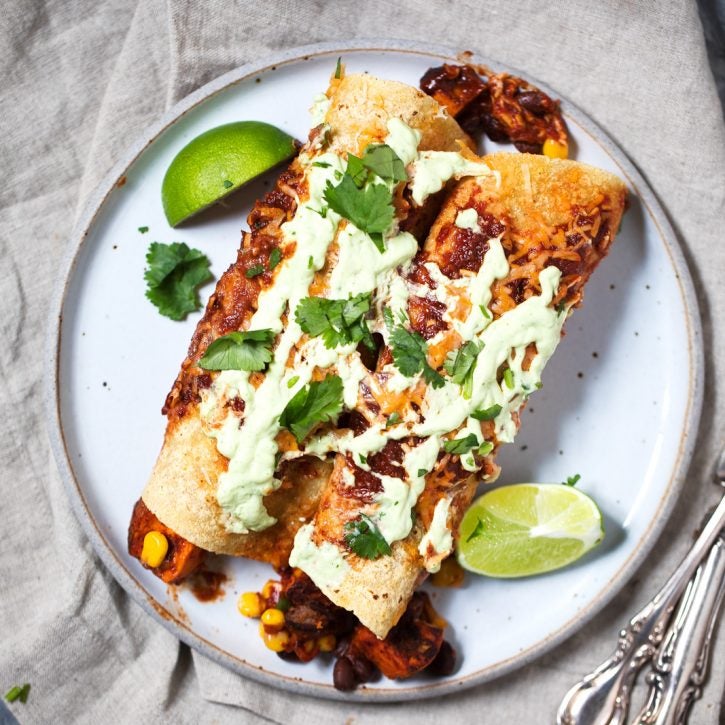
These healthy sweet potato black bean enchiladas might just be the best vegetarian enchiladas you’ll ever eat. They’re packed with flavor from delicious spices and an easy, homemade enchilada sauce, and are topped with an amazing avocado lime cream. The perfect vegetarian comfort food for weeknight dinners!
Prep Time30minutes
Cook Time50minutes
Total Time1hour20minutes
Serves4
Ingredients
2medium sweet potatoes, diced into 1/2 inch cubes
1tablespoonolive oil
1/2tablespoonchili powder
1teaspooncumin
1/2teaspoongarlic powder
1/4teaspoonsalt
1(15 oz) can black beans, rinsed and drained
1/2cupfresh or frozen corn
1 1/2cupsshredded Mexican cheese blend
8soft corn tortillas*
For the enchilada sauce:
2teaspoonsolive oil
1small white onion, finely minced
3clovesgarlic, minced
2 1/2tablespoonschili powder
1teaspooncumin
1teaspoondried oregano
1/4teaspoonsalt
1 (15 ounce)can tomato sauce
2tablespoonstomato paste
1/2cupwater (or broth of choice)
1/2teaspoonapple cider vinegar
Salt and pepper, to taste
For the avocado lime crema:
1/4cupnonfat plain greek yogurt
1/2ripe avocado
1lime, juiced
1/4cupcilantro
1/8teaspoonsalt
Garnish: chopped cilantro
Instructions
Preheat oven to 375 degrees F. Line a large baking sheet with parchment paper. Add diced sweet potatoes and drizzle with olive oil; add spices and salt on top, then give the sweet potatoes a toss so that they are evenly coated with olive oil and spices. Bake for 25-30 minutes or until sweet potatoes are fork tender.
While the sweet potatoes are cooking, make the enchiladas sauce: Heat oil in a medium pot over medium high heat. Add in onions and garlic and sauté for 5 minutes or until onions become translucent.
Add in chili powder, cumin, oregano, salt and stir for 30 seconds to allow the spices to cook a bit. Stir in tomato sauce, tomato paste, water and apple cider vinegar then bring to a boil.
Reduce heat to low and simmer for about 5 minutes, then remove from heat. Season with additional salt and pepper to taste, if necessary.
Keep heat in oven once sweet potatoes are done cooking. Add sweet potatoes to a large bowl and mix with black beans, corn and 1/4 cup enchilada sauce.
Spray a 9×11 inch pan with nonstick cooking spray, add 1/4 cup enchilada sauce to bottom of the pan and spread evenly.
Take a tortilla then fill with 1/3 cup of mixture, 1 tablespoon of shredded cheese and 1 tablespoon of enchilada sauce. Roll the tortilla up and place seam side down in the pan.
Repeat with each tortilla and place tightly next to each other. Pour remaining enchilada sauce then cheese on top. Bake for 20-25 minutes.
While the enchiladas are baking, you can make the avocado lime crema. In a blender or food processor, add the avocado, greek yogurt, lime juice, cilantro and salt. Blend until smooth and creamy. Add a tablespoon or two of water to thin out if necessary.
Once enchiladas are done baking, drizzle or spread the avocado lime crema on top. Garnish with extra cilantro and hot sauce, if desired. Makes 8 enchiladas total; serving size 2 enchiladas per person.
Recipe Notes
*Feel free to use flour tortillas if you prefer. Recipe is gluten free if you use gluten free corn tortillas.
Enchiladas can be made a day ahead and placed covered in the fridge. Simply bake for 10-15 minutes longer once you are ready to cook them.
How to freeze enchiladas (two ways!):
Bake first, then freeze. You can either bake it first, then cool to room temperature, slice into servings, place in freezer safe containers and then freeze. Or you can bake it, bring to room temp, and then freeze the entire pan. Just make sure you double wrap it so the enchiladas do not dry out. This is assuming you are freezing the entire pan. Once ready to reheat, thaw it out. Then bake, covered at 350 degrees F for 30-45 minutes or until heated through.
Freeze before baking: To freeze before baking, simply assemble the enchiladas as written in the instructions, then double wrap with plastic wrap and foil and freeze for up to 3 months. Once ready to bake, thaw out then bake according to instructions.
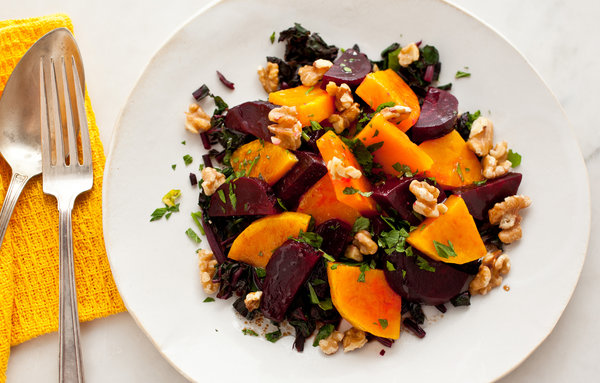
Roasted Beet and Winter Squash Salad with Walnuts. The colors of the vegetables were the inspiration behind this beautiful salad. You may be fooled into thinking the orange vegetables next to the dark beets are sliced golden beets, but they are slices of roasted kabocha squash.
Roast the beets. Preheat the oven to 425 degrees. Cut the greens off of the beets, leaving about 1/2 inch of the stems attached. Scrub the beets and place in a baking dish or ovenproof casserole. Add about 1/4 inch water to the dish. Cover tightly with a lid or foil, and bake 35 to 40 minutes, until the beets are tender. Remove from the heat and allow to cool. If not using right away, refrigerate in a covered bowl
Line another roasting pan with foil or parchment and brush with olive oil. Peel the squash and cut in 1/2-inch thick slices. Toss with 2 teaspoons of the olive oil and salt to taste and place on the baking sheet. Roast for 20 to 30 minutes, turning halfway through, until lightly browned and tender. You can do this at the same time that you roast the beets, but watch carefully if you need to put the baking sheet on a lower shelf. Remove from the heat and allow to cool
Meanwhile, bring a large pot of water to a boil while you stem and wash the greens. Add salt to the water, and blanch the greens for 1 minute or until tender. Transfer the greens to a bowl of cold water, then drain and squeeze out the water. Chop coarsely
Mix together the vinegars, garlic, salt, pepper, the remaining olive oil and the walnut oil. When the beets are cool enough to handle, trim the ends off, slip off their skins, cut in half, then slice into half-moon shapes. Toss with half the salad dressing. In a separate bowl, toss the roasted squash with the remaining dressing
Place the greens on a platter, leaving a space in the middle. Arrange the beets and squash in alternating rows in the middle of the platter. Sprinkle on the fresh herbs and the walnuts. If desired, sprinkle on crumbled feta. Serve
Tip
Advance preparation: Roasted beets and squash will keep for 4 to 5 days in the refrigerator. Cooked beet greens will keep for about 3 days, and can be reheated. The salad will hold in the refrigerator for a couple of hours, but it’s prettiest when served right away.
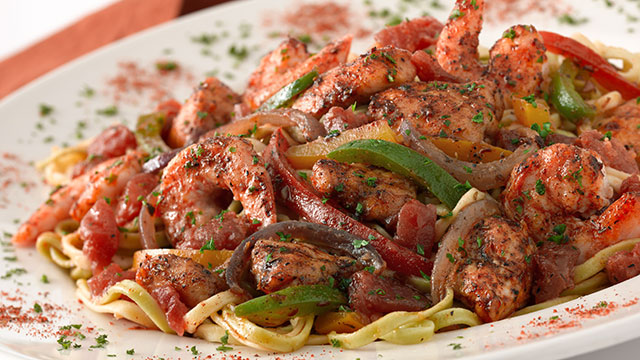
Cajun Jambalaya Pasta. Yes this is the Cheesecake Factory, but I’m telling you that the only other place I’ve tasted better was in New Orleans. Now you can jazz this up. Add or subtract.Try it.
Servings: 2
Ingredients
2 fz. Olive Oil
1 lb. Boneless/Skinless Chicken Breasts, cut into 1″ pieces
2 Tbls. Cajun Spice Blend
4 oz. Red, Yellow, Green Peppers, cut into thin strips
4 oz. Red Onions, cut into thin strips
6 oz. Shrimp (shells, tails, and veins removed)
1 Tbl. Blanched Garlic, minced
2 tsps. Cajun Spice Blend
1/2 tsp. Kosher Salt
1/4 tsp. Ground Black Pepper
4 oz. Roma Tomatoes, diced 1″ pieces
1-1/2 cups Spicy Chicken-Seafood Broth
1 Tbl. Chopped Parsley
1 lb. Linguini Pasta (fresh)
Instructions
Heat the olive oil in a large sauté pan. Place the chicken into a clean mixing bowl. Sprinkle the Cajun spice over the chicken and into the bowl. Gently toss the chicken until each piece is evenly coated with the spice.
Add the chicken into the sauté pan and cook until it is about half done. Add the peppers, onions and shrimp into the pan. Cook until the shrimp are about half done. Add the garlic into the pan. Season all of the ingredients with kosher salt, ground black pepper, and a little more Cajun spice.
Add the diced tomatoes and chicken-seafood broth into the sauté pan. Gently stir the ingredients together. Continue to cook until the chicken and shrimp are done, and the vegetables are tender.
Drop the pasta into boiling salted water, and cook until “al dente.”
Place the pasta into serving bowls. Spoon the jambalaya over the pasta. Garnish with a sprinkle of freshly chopped parsley.
5-Ingredient Cookie Dough Bread. Despite using no flour at all, it’s super soft and spongy. It also only requires a total of five ingredients, including the all-stars that give it that beloved cookie dough flavor: cashew butter and unsweetened chocolate chips. If you want to try it for yourself, here’s everything you’ll need.
Cookie dough bread
Ingredients
4 eggs
1 tbsp apple cider vinegar
1 tsp baking soda
1 cup of cashew butter
unsweetened chocolate chips to taste
Directions
1. Whisk all ingredients (except chocolate chips) in a stand or electric mixer until well incorporated.
2. Fold in desired amount of chocolate chips then pour batter into a standard bread loaf pan lined with parchment paper. The batter may be runny depending on the nut butter used; this is normal.
3. Top with extra chocolate chips if desired, and bake for 30 minutes at 350°F.
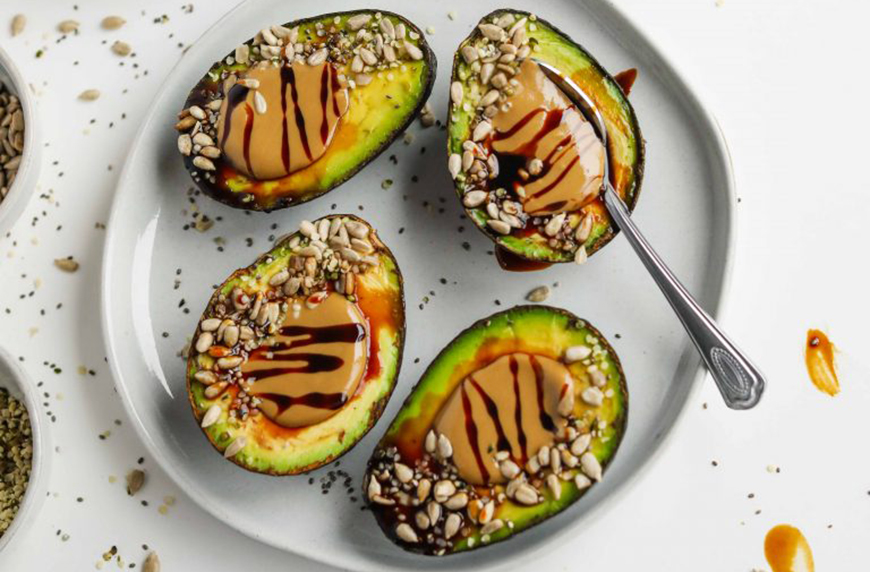
Yummy for the Tummy. Stuffed Avacados. You have so many different ways to use Avocados. Instead of filling her avocados with grains, eggs, and other typical stuffed avocado ingredients, Lauren Kirchmaier, the recipe developer behind Flora & Vino, went the sweet (and plant-based!) route with her Superseed SunButter Stuffed Avocados. After halving and pitting her avocados, she filled them with a handful of healthy toppings: organic sunflower butter, sunflower seeds, chia seeds, hemp hearts, and date paste or maple syrup. That’s all you need.
Dessert stuffed avocados
Ingredients:
avocados, split in half and pits removed Organic SunButter, or your sunflower butter of choice
sunflower seeds
chia seeds
hemp hearts
date paste or maple syrup
Directions:
1. Take an avocado half and fill in the center with SunButter.
2. Sprinkle avocado with sunflower seeds, chia seeds, and hemp hearts.
3. Drizzle with date paste and serve immediately.
These are the surprising avocado health benefits you should know about:
Recipe developed for Imperial Sugar by Ashton Swank @somethingswanky.
Whipped Shortbread Cookies. Try them, you’ll like them. Whipped shortbread cookies may look fancy, but they are incredibly simple to make. This four ingredient recipe for melt-in-your-mouth Whipped Shortbread Cookies is an absolute necessity for the holiday baking season. Decorate with chocolate, sprinkles, jam – the possibilities are endless.
Optional: sprinkles, colorful candies, melted chocolate, jam for toppings and fillings
*Spoon & Sweep method: Use a spoon to fill measuring cup with flour until required amount is obtained. Scooping measuring cup directly into flour bag will firmly pack flour resulting in too much flour required for recipe.
Directions
Preheat oven to 300ºF. 1
Using a stand mixer fitted with a paddle attachment beat butter and sugar until light and fluffy.2
In a separate bowl, sift together flour and cornstarch. In three additions, gradually mix dry ingredients into butter and sugar mixture.3
Scoop dough by the tablespoon and roll into a ball with palms. Place on an ungreased baking sheet, leaving 1-inch between each cookie. Press lightly with a fork or create an indentation with thumb or spoon (for filled thumbprint cookies).4
For pressed cookies, add sprinkles to the cookies before baking.5
For filled thumbprint cookies, spoon a teaspoon of jam into the indentation before baking. Alternately, fill with caramel sauce or fruit curd after baking.6
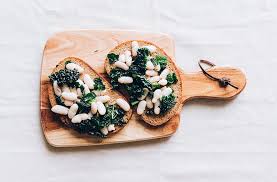
Let’s do Tuscan white bean toast. The super garlicky Tuscan white beans that are served with the bread can be better than the pasta. The plant-based mix isn’t just healthy, as it contains high amounts of fiber and plant-based protein, but it’s loaded with flavor. Instead of something only to enjoy before your main course, it can easily stand on its own for a healthy meal—just ask Erin Clarke, creator of Well Plated and author of The Well Plated Cookbook, who created a simple recipe that can be put together in record time.
Tuscan white bean toasts with garlic and tomatoes
Ingredients
4 slices of thick, good quality whole wheat bread
3 tablespoons plus 4 teaspoons extra-virgin olive oil, divided
1 small shallot (finely chopped)
1 pint cherry tomatoes (2 cups, left whole)
1/2 teaspoon kosher salt
1/2 teaspoon black pepper
3 cloves minced garlic
2 teaspoons red wine vinegar
1 teaspoon honey
1 15-ounce can reduced sodium white (cannellini) beans, rinsed and drained
2 tablespoons finely grated Parmesan (can use dairy-free or nutritional yeast)
1 tablespoon chopped fresh thyme
Directions.
1. Place a rack in the upper third of your oven and preheat the oven to 400°F. Arrange the bread in a single layer on a parchment lined baking sheet. Brush each side with 1/2 teaspoon olive oil. Bake for 5 minutes, then flip the slices and return to the oven. Continue baking until the bread is nicely toasted, about 5 additional minutes. Remove from the oven and set aside.
2. Meanwhile, heat the remaining 3 tablespoons olive oil in a large, nonstick skillet over medium heat. Add the shallot, tomatoes, salt, and pepper. Let cook, stirring occasionally, until the tomatoes break down and their juice begins to caramelize in the skillet, about 10 to 12 minutes.
3. Stir in the garlic, red wine vinegar, and honey. Let cook 30 seconds, or until just fragrant, then stir in the white beans. Let cook 1 to 2 minutes, until the beans are warmed through. Taste and adjust seasoning as desired.
4. To serve, arrange the toasted bread slices on plates. Top with generous spoonfuls of the tomato bean mixture, then sprinkle with Parmesan or nutritional yeast and thyme. Enjoy immediately.
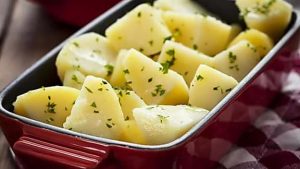
Due to their higher carb content, many people avoid potatoes when trying to lose weight, but they shouldn’t.
Whole potatoes are loaded with vitamins, fiber and other important nutrients. They also contain a certain type of starch called resistant starch (8, 9).
Resistant starch contains half the calories of regular starch (2 instead of 4 calories per gram). In your digestive system, it acts a lot like soluble fiber, helping you feel full.
Because adding resistant starch to meals helps satisfy hunger, it causes people to eat fewer calories (10, 11).
Interestingly, cooling potatoes after they’re cooked increases their resistant starch content. In fact, studies show that cooling and reheating potatoes multiple times continues to increase their hunger-suppressing effect (12).
In a study that measured the ability of 38 foods to satisfy hunger, boiled potatoes ranked the highest (1).
While boiled potatoes were the most satisfying food tested, fried potato chips were found to be three times less filling.
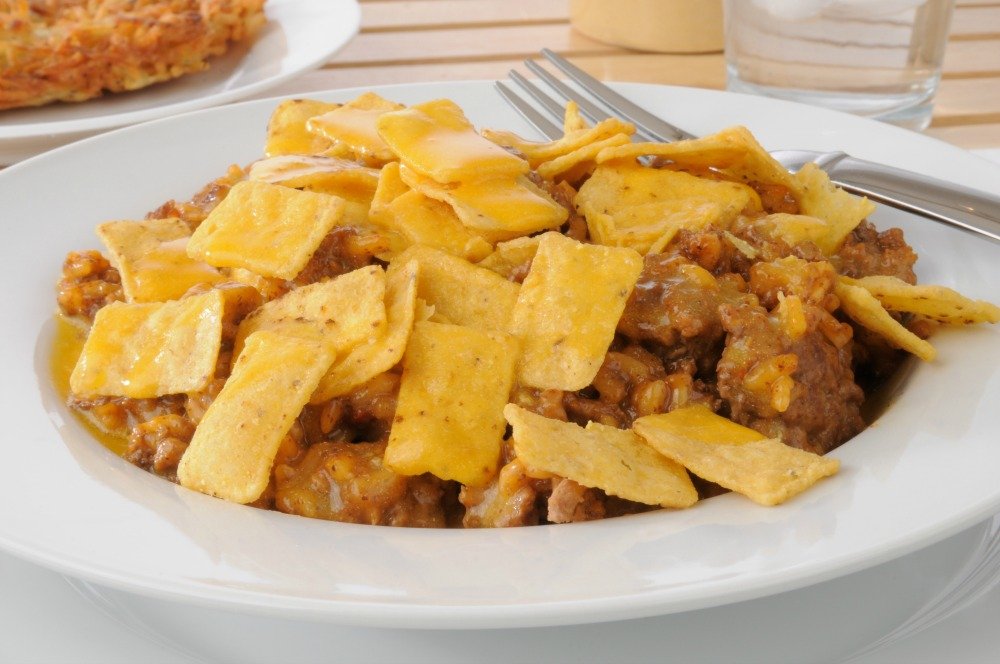
Taco Casserole is The Simple Twist Your Taco Tuesday Desparately Needs. OK so it’s Monday.
Is TacoTuesday popular at your house? If it is, but you want to switch up the routine a bit, this Taco Casserole is the perfect addition to your weekly meal plan and I promise you’ll love its simplicity and look like a genius to your entire family.
This foolproof dish can be on the table in less than an hour, and has all the flavors your kids love in their tacos. Not to mention, it’s really fun and easy to make, so little hands can even help in the kitchen crushing up those tortilla chips!
Taco Casserole
By Krista Marshall
Serves
4-6
Active Time
Total Time
Ingredients
1 lb ground beef
1 packet taco seasoning
1 (16-oz) can refried black beans with onion and garlic
1 (16-oz) jar mild chunky salsa
1 green pepper, chopped
1 (2.2-oz) can sliced black olives
3 Roma tomatoes, chopped, divided
1 cup shredded taco blend cheese
1 cup shredded lettuce
2-3 cups tortilla chips, slightly crushed
Directions
Preheat oven to 350.
Add enough broken tortilla chips to bottom of 9×13 dish to cover.
In a large skillet brown beef until no longer pink.
Add taco seasoning, stir well.
Add beans and salsa.
Stir well.
Cook 5-7 minutes to allow flavors to combine.
Add to top of chips.
Spread evenly.
Add green pepper and ⅔ chopped tomato.
Sprinkle top with cheese and bake for 20-25 minutes until cheese melts.
Top with optional ingredients (tomato, lettuce, black olives, more broken chips) before serving.
Kitchen Counter
Serves 4-6.
Cook’s Note
If you can’t find the refried black beans, a can of traditional ones will work too.
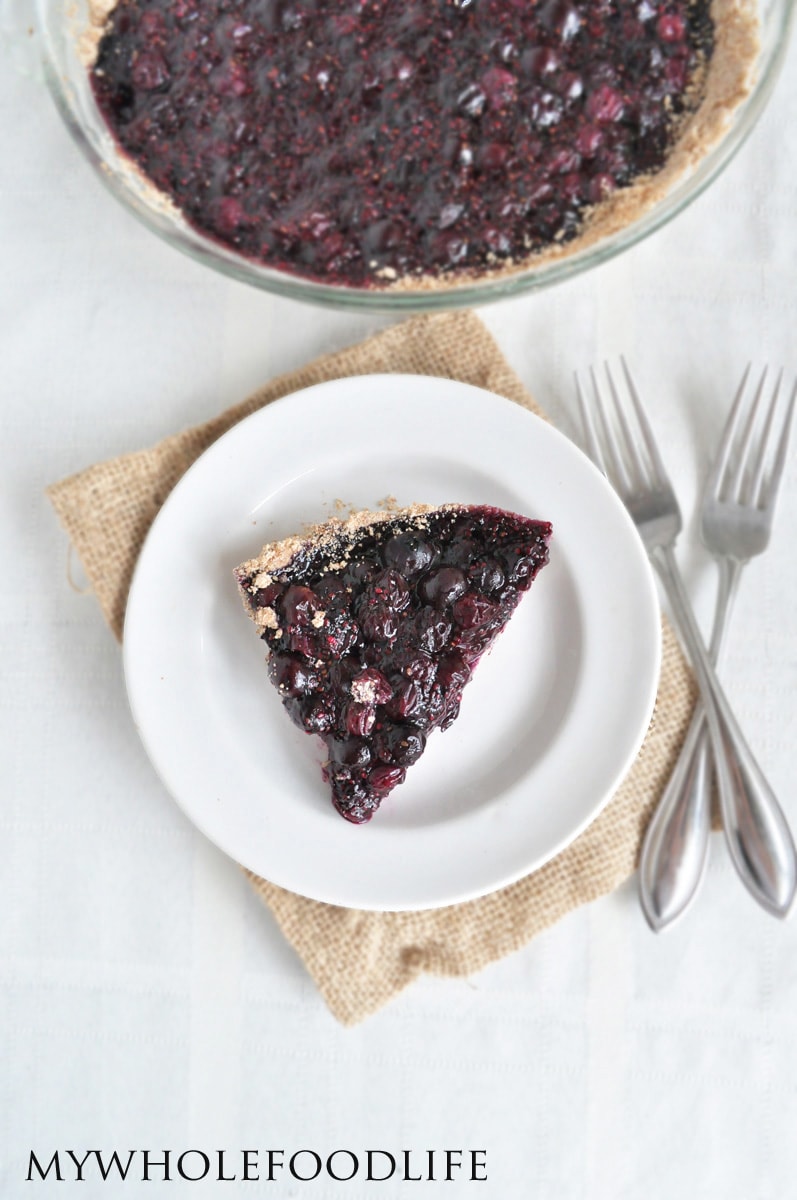
Healthy Blueberry Pie. When it’s filled with the best of the best of seasonal fruit. Peaches, strawberries, it’s all fair game. But honestly, blueberry pie is what truly takes the cake, er, pie slice.
In a food processor , mix the flour and salt. Add in the coconut oil and flax egg and pulse until a dough starts to form.
Press the dough into a glass pie dish and bake for about 9-10 minutes.
In a medium saucepan, combine the blueberries, maple syrup, water, lemon juice, cinnamon, and salt. Bring to a boil and then turn down and simmer for about 3-5 minutes.
Once the mixture is done simmering, add in the chia seeds and arrowroot and mix well. Let the mixture sit for about 5 minutes.
Pour the blueberry mixture into the pie crust and bake for 15-20 minutes.
by Melissa King
Recipe Notes
Please keep the pie stored in the fridge. It should last at least a week. You may even be able to freeze it, but I haven’t tried to say for sure. The crust recipe I used was from Elana’s Pantry .
Skillet-Baked Pumpkin Rolls Damn, These Are Delicious. Coated in a pumpkin spice and sugar mixture and brushed with melted butter, they’re melt-in-your-mouth-fantastic. A straightforward recipe is always appreciated, and if the ingredient list and instructions are short, even better! Pop that can open, cut each roll into quarters, coat, and bake. For a bit of a crunch, you can sprinkle candied pecans or chopped walnuts as a bonus. That’s all there really is to it.
Notes. This is a Trader Joe Recipe, you can substitute.
If you cut the recipe in half, keep pumpkin rolls in the oven for about 15-20 minutes.
Preheat oven to 350°F. Grease a 10-inch cast-iron skillet with coconut oil spray.
Remove pumpkin rolls from packaging, set icing aside. Lay each roll flat and cut into quarters.
In a small bowl, combine sugar and pumpkin spice. Coat each quarter piece in spice mixture and place in skillet (should be a snug fit).
Brush rolls with melted butter. Place skillet on center oven rack and bake for 25-30 minutes.
Remove from oven. In a small bowl, combine one icing packet with 2 tablespoons water. Brush over baked pumpkin rolls and sprinkle chopped pecans (optional). Serve extra icing on the side as dipping sauce.
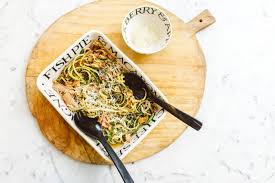
Bobbi Brown’s Zucchini Pasta. Here’s a lady who gives us a quick meal that’s tasty. You’re probably looking at 10-15 minutes. This is a go-to recipe. You’ll love the combination of the zucchini nooldes, tuna and zesty Italian spices
In a hot pan, heat olive oil. Add herbs and saute until fragrant, a couple minutes. Add in zucchini pasta and saute until tender. Mix in tuna or beans and marinara sauce until well coated and mixed. Season with salt and pepper. Garnish with parmesan if using. Serve hot.
The Paloma is a drink that hails from the vibrant and incredibly culturally layered country of Mexico. It is normally made using a tequila base, lime juice, a grapefruit-flavored soda (dealer’s choice between something generic, Fresca, Squirt, or Jarritos), a lime wedge and is served on the rocks.
Like many drinks, there are different variations that can be incorporated so that all may enjoy them. For example: don’t like grapefruit, use club soda as a possible option (this is a great substitution if you want to go sugarless).
But the below recipe is a take on the Paloma that is like no other. Jaime Salas, Ambassador for Milagro Tequila, shared with HOLA! USA his super simple and delightful recipe using this premium tequila below!
Ingredients:
1 ½ parts Milagro Reposado
½ part Ancho Chili Liqueur
½ part Fresh Lime Juice
3 parts Grapefruit Soda
Lime Wheel
Preparations:
Using a lime wedge, wet the rim of the glass and salt half the rim. Add ice, Milagro Reposado, Ancho Reyes and grapefruit soda. Squeeze a wedge of lime and discard.
Top Chef Kevin Gillespie’s All-Star Banana Pudding Will Become a Family Favorite. Yes I’m sharing my space with another chef. He’s got a winner here. Nobody does it better than Grandma. Enjoy.
Warm Banana Pudding
By Kevin Gillespie
Serves
12
Active Time
Total Time
Ingredients
2 cups half-and-half
2 cups whole milk
1 vanilla bean pod, split
1½ tsp vanilla extract, divided
2½ cups sugar, divided
8 large eggs, separated
1 cup flour
1 tsp salt
6 Tbsp butter, cubed
1 (12-oz) loaf lb cake, sliced ¼ inch thick
½ cup strong brewed coffee
8–9 very ripe bananas, peeled and cut into ½-inch coins
½ tsp cream of tartar
Directions
Preheat oven to 375°F.
In a large saucepan over medium-high, combine half-and-half, milk, vanilla bean pod and ½ tsp extract. Cook 4 minutes or until bubbles start to form around edges; remove from heat. Fish out vanilla pod. Use a paring knife to split pod and scrape out beans; add to milk mixture. Discard pod.
In a large bowl, whisk 2 cups sugar and yolks 1 minute or until very thick and pale yellow. Sift in flour; add salt. Stir to combine. Slowly whisk in ¾ cup milk mixture. Whisk yolk mixture into pan. Return pan to medium heat; cook 8 minutes or until thickened, stirring constantly. Remove from heat. Whisk in butter, 1 cube at a time, until incorporated. Blend with an immersion blender 1 minute. Press pudding through a fine-mesh strainer to remove any remaining lumps.
Arrange pound cake in a single layer on a baking sheet. Place in oven 6 minutes or until lightly browned. Remove from oven; turn slices. Toast 4 minutes or until lightly browned. Remove from oven; brush both sides with coffee.
Spoon about 1½ cups pudding into bottom of a 2-quart deep casserole dish. Layer pound cake and bananas on top. Repeat process, ending with a layer of pudding.
In a small bowl, whisk remaining ½ cup sugar and cream of tartar. Place egg whites in bowl of a stand mixer fitted with a whisk attachment, beat 2 minutes or until thick and frothy. With motor running, gradually add sugar mixture. Add remaining 1 tsp extract; beat until soft peaks form.
Mound meringue on top of pudding; spread to cover evenly and seal at edges. Use back of a spoon to swirl meringue into peaks. Bake 5 minutes or until peaks are browned. Let stand 15 minutes before serving.
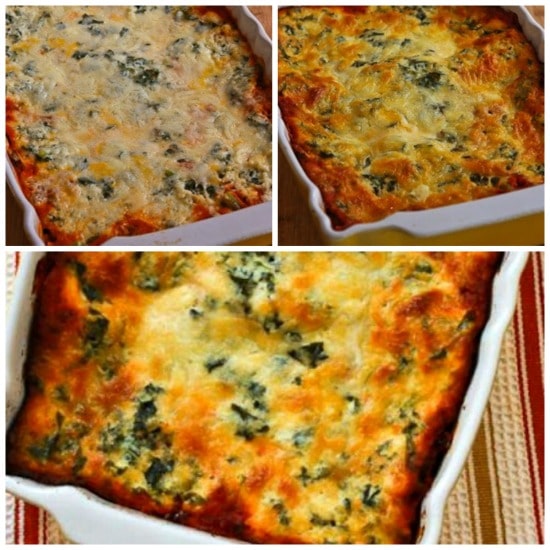
This Kale and Mushroom Lasagna recipe will soon become part of your regular pasta night rotation.There’s literally never a bad time for pasta. Even during the hottest summer weather, nothing quite beats a plate of spaghetti or a bowl of pesto-drenched ravioli. But if you’re sick of just boiling noodles and tossing them with sauce, Chef and Well+Good Council member Candice Kumai has the 201-level recipe that every pasta-lover should know how to make: lasagna. Yes, the layered pasta dish looks complicated and intimidating, but this recipe is super easy to follow and comes together in under an hour. The best part? It’s filled with vegetables and is vegetarian-friendly—just look for a Parmesan that uses vegetarian rennet or is explicitly labeled vegetarian. Trust us: This kale and mushroom lasagna recipe will soon become part of your regular pasta night rotation.
One-Pan Kale Mushroom Lasagna
Serves 6
Ingredients
Olive oil cooking spray + for the baking dish 2 tablespoons extra-virgin olive oil
1⁄2 yellow onion, finely chopped
4 cups sliced cremini mushrooms
2 cups shredded lacinato kale leaves
2 cups part-skim ricotta cheese 3 cups Homemade Kale Marinara Sauce (or jarred organic marinara)
6 no-boil lasagna sheet noodles
1⁄4 cup finely grated Pecorino Romano or Parmesan cheese
1. Preheat the oven to 375 ̊F. Lightly spray a 9 x 13-inch baking dish with olive oil cooking spray, and set aside.
2. In a large sauté pan, warm the olive oil over medium-low heat. Add the onion and cook until translucent, 6 to 8 minutes. Add the mushrooms and shredded kale, and cook for an additional 5 minutes, stirring occasionally. Remove from heat, and let cool slightly.
3. Put the ricotta cheese in a large bowl, and, using a spatula, gently fold in the cooled mushroom-kale mixture until completely incorporated.
4. Using the prepared baking dish, assemble the lasagna in six layers as follows: 1 cup marinara sauce, spread evenly; 3 lasagna noodle sheets (arranged in a single layer); 3⁄4 cup of the kale-mushroom-and ricotta mixture, spread evenly. Repeat the layering a second time, then top with the remaining kale-mushroom and ricotta mixture, and finish with grated Pecorino Romano or Parmesan cheese on top.
5. Cover with aluminum foil, and bake in the preheated oven, on the middle rack, for about 25 minutes. After 20 minutes have passed, remove the foil from the baking dish and move the baking dish to the top rack. To finish, bake, uncovered, for another 5 to 10 minutes, depending on how you love your lasagna finished.
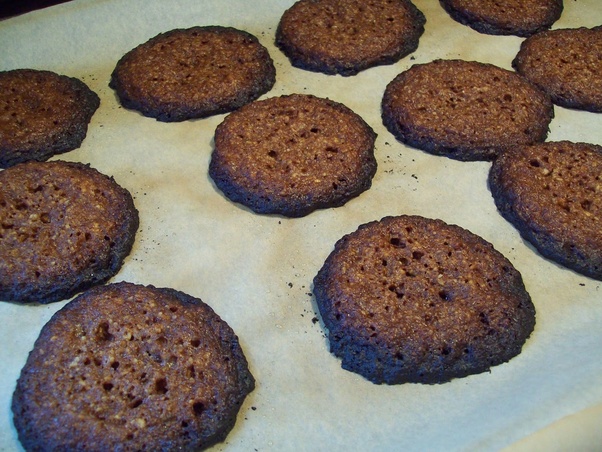
5 Ingenious Tricks for Saving Burnt Cookies. It doesn’t take long for cookies to go from an irresistible golden brown to a dispiriting black (especially if you’re baking at a high altitude). But before you toss them in the trash and start rummaging around in your pantry for a store-bought snack, we have a few suggestions for saving that imperfect batch.
1. Grate off the burnt bits of cookie with a zester or cheese grater.
All you have to do is slide the cookie along your cheese grater to get rid of the burnt layer on the bottom. The smaller the holes, the better, so a lemon zester works well for this, too.
2. Scrape the burned part of the cookie off with a knife.
If you don’t have a cheese grater, you can get the same results with a regular knife—it just might take you an extra minute or two. Instead of slicing off the entire bottom of the cookie, hold your knife blade perpendicular to the bottom of the cookie and carefully scrape away the burnt crumbs.
3. Store the burned cookies in a jar with a piece of bread.
Even after you’ve shaved off the blackened evidence of your culinary blunder, your cookies might still be crispier than you’d prefer. Store them in an airtight container with a slice of bread—they’ll soak up the moisture and soften right up.
4. Make ice cream sandwiches with your burned cookies.
Snackers won’t scoff at your grated cookies if they can’t even see the bottoms. Slather one with a nice, thick layer of ice cream, slap another one on top, and roll the edges in your favorite topping for a treat that’s better than any cookie—burnt or not.
5. Transform your burned cookies into a cookie crust.
For charred, crunchy cookies that seem beyond salvation, you can completely cut off the burnt bottoms, crush the remains, and turn them into a cookie crust for a pie or cheesecake


