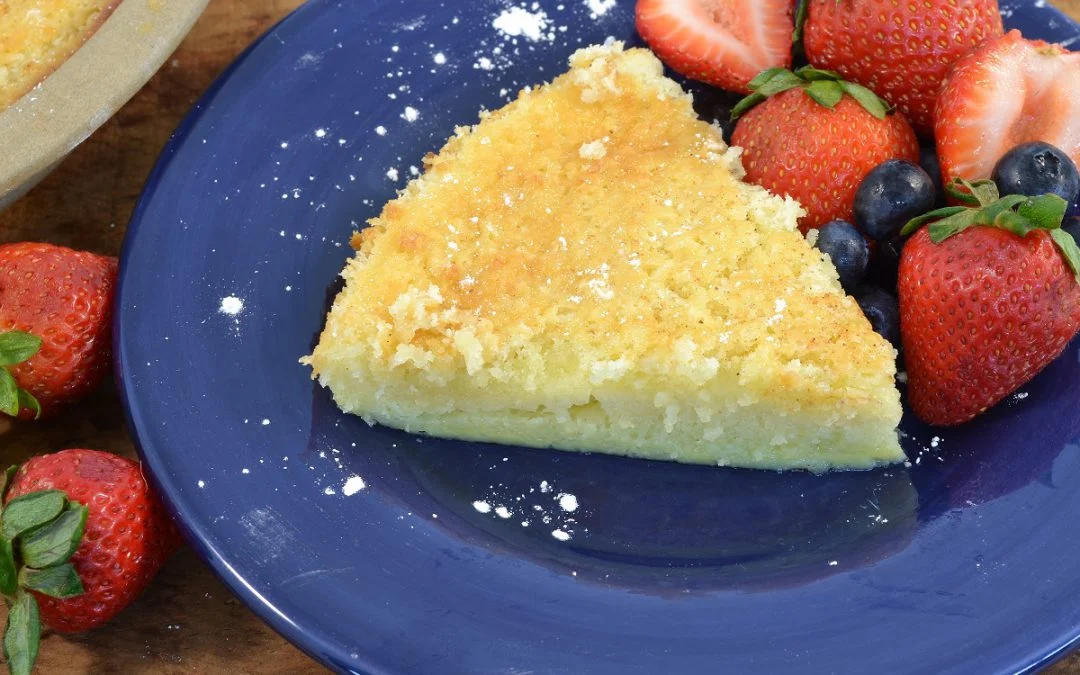
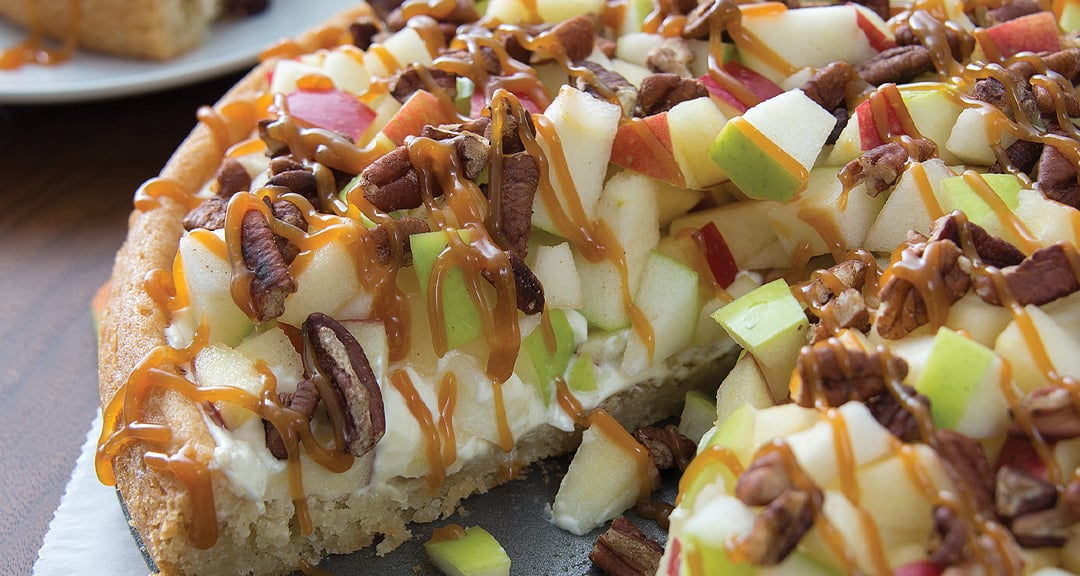
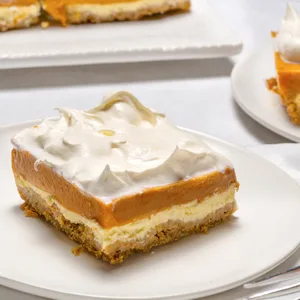
Categories
Food Life Recipe Reprints from other.

Zucchini Chips.

Views: 28

Zucchini Chips.

It’s summer squash season, and that means zucchini! Try these yummy recipes that make this veggie the star. If you haven’t tried zucchini chips, you are in for a real treat! These crispy, baked veggies make a healthy snack you won’t feel guilty about later.

Ingredients you will need:

  • 2 large zucchini, sliced into 1/4″ chips
  • 1/4 cup dry bread crumbs
  • 1/4 cup fresh grated Parmesan cheese
  • 2 egg whites
  • 1/4 teaspoon seasoned salt
  • 1/4 teaspoon garlic powder
  • 1/8 teaspoon freshly ground black pepper
  • Optional seasonings (1/4 teaspoon): dried onion powder, oregano, Mrs. Dash seasoning, Cajun seasoning, Stevia, parsley, or basil
  • Preheat oven to 450 degrees. Wash the zucchini and slice up your zucchini into quarter inch slices.
  • Crack two egg whites into one bowl.

    Mix breadcrumbs, Parmesan cheese, and seasoning in another bowl.

    Dip the zucchini chips, one by one, first into the egg whites then into the dry mixture.

    Place your chips on a baking sheet. You might want to place foil or parchment with spray over the top

    Bake for 7 minutes in a 450 degree oven. Then turn the chips over and bake for another 7-9 minutes or until golden brown on both sides. Serve them while they’re hot!

Loading

Categories
Food Links from other sources. Recipe

Fruited Balsamic Chicken.

Views: 31

Fruited Balsamic Chicken.

INGREDIENTS (Serves 2)

2 T. olive oil
2 (5 to 6 oz.) chicken breast halves
½ C. chopped onion
Salt and pepper to taste
½ tsp. minced garlic
2½ T. balsamic vinegar
1½ tsp. honey
1 medium peach (ripe but still firm), sliced
1 C. pitted sweet cherries
Sliced fresh basil, optional

DIRECTIONS

Heat the oil in a medium skillet over medium heat. Add the chicken and dump the onion around the outer edge of the skillet; season with salt and pepper. Fry the chicken a few minutes on each side, until golden brown, stirring the onion often. Transfer the chicken to a plate.

Add the garlic to the skillet with the onion and heat for 30 seconds or so. Stir in the vinegar and cook for a couple of minutes, until the liquid is reduced by about half. Stir in the honey, then add the peaches and cherries, tossing to coat.

Return the chicken and any accumulated juices to the skillet, nestling the pieces among the fruit; season everything with a little more salt and pepper. Cover the skillet, reduce heat to medium-low, and simmer for 7 to 8 minutes, until the internal temperature of the chicken reaches 165°. Top with basil.

Loading

Categories
Food Life Recipe Reprints from other.

Ice Cream Sandwich Recipe.

Views: 20

Ice Cream Sandwich Recipe.

Looking for a chilling and thrilling dessert that’s out of the ordinary? This Giant Brownie Ice Cream Sandwich is just what you need to bring your next party or celebration from great to perfect! It features delicious ice cream in-between two luscious brownies for a taste so good that it could be the very reason to have the party!

  • 2 8-inch square baking pans
  • Aluminum foil
  • Basking sheet or freezer-proof serving platter
  • 1 19 to 22 oz. pkg. brownie mix
  • Eggs (oil, and water as directed on package)
  • 1 C. chopped Milky Way candy bars
  • 1 qt. vanilla ice cream
  • 1 1/2 C. whipped topping
  • 1 C. candy coated chocolate candies (M&M’s)
  1. Line two 8-inch square baking pans with aluminium foil, shiny side up. Lightly coat with cooking spray.
  2. Chop 3 frozen Milky Way bars. This should make approximately 1 cup of Milky Way pieces.
  3. Prepare brownie mix according to directions on package. This should include eggs, oil, and water, as well as the mix itself. Once brownie mix has been stirred, add Milky Way pieces to mixture. Stir.
  4. Distribute mixture evenly across prepared 8-inch pans. Be sure to push batter into corners. Place in oven preheated to 350 degrees for 25 minutes.
  5. Once brownies bake, allow to cool, then place in freezer for 1 hour. Remove from freezer and then remove aluminum foil.
  6. Remove 1 quart vanilla ice cream from freezer (if you like, you could soften the ice cream beforehand in a refrigerator). Completely remove ice cream from box and cut ice cream into several blocks that will cover an entire block of brownie. Once brownie block is covered, place the other brownie block on top of the ice cream. Smooth out edges of ice cream as necessary.
  7. Cover top brownie block with whipped topping. We choose to cover the edges and place a dollop of topping in the middle, but you can do as you prefer.
  8. Place M&M’s on whipped topping.
  9. Place in freezer until serving Refreeze any leftovers.

If preferred, you can make this without the Milky Way bars, or use another candy altogether!


Loading

Categories
Food Life Links from other sources. Recipe

Mississippi Mud Cake Recipe | Chocolate Marshmallow Brownies.

Views: 22

Mississippi Mud Cake Recipe | Chocolate Marshmallow Brownies.

Prepare to have you mind (not to mention your taste buds) blown: our Mississippi Mud Cake is one of the richest, sweetest, most awesome desserts you’ll ever have! This brownie-like dessert is an out-of-this-world combination of chocolate, marshmallow, coconut, and pecans that sets a new standard in tasty treats. And with our recipe, you can be ground zero for it in your neighborhood!

Ingredients.

  • 1 cup butter (melted)
  • 2 cups sugar
  • 1 1/2 cup flour
  • 1/3 cup cocoa
  • 4 eggs (beaten)
  • 1 cup chopped pecans
  • 1 cup coconut
  • 1 jar marshmallow creme
  • For the Frosting:
  • 1 stick butter (melted (1/2 cup))
  • 1/3 cup cocoa
  • 1/2 cup evaporated milk
  • 2 cup powdered sugar
  • 1 teaspoon vanilla
  • 1 cup chopped pecans
  • Directions.
  1. Preheat oven to 350 degrees.
  2. Combine 2 cups sugar, 1 1/2 cup flour, and 1/3 cup cocoa in large mixing bowl.
  3. Add 4 beaten eggs and 1 cup melted butter. Stir.
  4. Add 1 cup chopped pecans and 1 cup coconut. Mix.
  5. Add mixture to 9 x 13 inch greased pan.
  6. Spread mixture evenly across pan. Place in preheated 350 oven for 30 to 40 minutes.
  7. In saucepan over medium heat, add 1 stick (1/2 cup) melted butter.
  8. Add 1 cup cocoa. Mix.
  9. Stir in 1/2 cup of evaporated milk and 2 cups powdered sugar.
  10. Add 1 cup chopped pecans and 1 teaspoon vanilla. Remove from heat before frosting reaches boil.
  11. When the main dish is finished baking, remove it from oven. Apply marshmallow cream across cake.
  12. Apply frosting across top of cake. Allow to completely cool before cutting and serving.

Loading

Categories
Food Life

Put a little crunch in your life. Portabella Mushroom Salad Recipe | Chicken and Mushroom Salad.

Views: 26

Put a little crunch in your life. Portabella Mushroom Salad Recipe | Chicken and Mushroom Salad. Alot of ingredients, but this is a very good recipe.

Ingredients you will need for salad:

  • 2 chicken breasts, sliced
  • 4 to 6 portabella mushrooms
  • Mixed greens
  • 1 C. roasted red and yellow peppers, sliced
  • Goat cheese
  • Toasted pine nuts

Ingredients you will need for chicken marinade:

  • 1/4 C. Greek yogurt
  • 2 T. white wine or red wine vinegar
  • 1 T. chopped garlic
  • Oregano
  • Seasoning salt

Ingredients you will need for mushroom marinade:

  • 1 T. chopped garlic
  • 1/4 C. balsamic vinegar
  • Extra virgin olive oil
  • Salt and pepper

De-stem portabella mushrooms. In a mixing bowl, combine balsamic vinegar, garlic, extra virgin olive oil, and salt and pepper to make the mushroom’s marinade.

Place the marinade in a plastic bag or Tupperware container. Add a mushroom, seal the container, and shake, coating mushroom with marinade. Repeat until all mushrooms are marinated

In another bowl, combine Greek yogurt, white wine, chopped garlic, oregano, and seasoning salt to make chicken marinade. Coat chicken breasts. If possible, leave in refrigerator for 12 hours. Make sure chicken is thoroughly coated. Cook chicken breasts and mushrooms on grill pan.

On the bottom side of the mushrooms, place chicken, mixed greens, red and yellow peppers, goat cheese, and toasted pine nuts.

Serve and enjoy!

Loading

Categories
Food Life Links from other sources.

Cheesecake Pretzel Bites Recipe | Cream Cheese Balls.

Views: 13

Cheesecake Pretzel Bites Recipe | Cream Cheese Balls.

Make these tasty cheesecake pretzel pops for a dessert your friends and family will love! These sweet cream cheese bites are a refreshing treat that are unbeatable at a party or special occasion. Try them with caramel and strawberry dipping sauce.

Ingredients.

  • 2 8 oz. pkgs. cream cheese, softened
  • 1 t. vanilla
  • 1 t. lemon juice
  • 1 C. powdered sugar
  • 1 C. graham crackers, finely crumbled
  • Pretzel sticks
  • Directions
  1. Combine cream cheese, vanilla, lemon juice, and powdered sugar. Place bowl in freezer for a brief period to allow ingredients time to set.
  2. Using a spoon, scoop out of dollop of cream cheese mixture and place in a bowl of finely crushed graham crackers.
  3. Carefully roll into a ball.
  4. Insert pretzel sticks into cheesecake ball. Repeat until mixture is used up. Refrigerate cheesecake balls for at least an hour.
  5. Serve and enjoy!

Loading

Categories
Food Life Links from other sources. Recipe Reprints from other.

Everyone loves Pasta. Don’t They? Bacon Cheeseburger Skillet

Views: 19

Everyone loves Pasta. Don’t They?  Bacon Cheeseburger Skillet. There are few things as comforting as a bowl of pasta at the end of a long day.

This bacon cheeseburger skillet is meal that’s incredible tasty and surprisingly easy to make. The whole family will adore this hearty dinner so much they won’t believe you didn’t spend all day on it!

Ingredients.
  • 6 bacon strips
  • 1/2 lb. ground beef
  • Season salt to taste
  • Black pepper to taste
  • 1/4 C. chopped onion
  • 1 15 oz. can tomato sauce
  • 1 C. beef broth
  • 1/2 C. water
  • 8 oz. uncooked rotini pasta
  • 3 Roma tomatoes, diced
  • 1 C. canned diced tomatoes
  • 2 T. ketchup
  • 1 T. spicy brown mustard
  • 1/2 C. shredded cheddar cheese
  • Directions
  1. Brown 6 bacon strips and 1/2 lb. ground beef in skillet, breaking ingredients apart as they cook. Season to taste with season salt and black pepper.
  2. Dice 3 Roma tomatoes and 1/4 cup onion.
  3. Add diced onions and tomatoes to skillet.
  4. Add 1/2 cup water, 15 oz. tomato sauce, and 1 cup beef broth.
  5. Add 8 oz. uncooked rotini pasta.
  6. Add 8 oz. canned, diced tomatoes.
  7. Add 2 tablespoons ketchup.
  8. Add 1 tablespoon spicy brown mustard.
  9. Bring heat to a boil.
  10. Once boil is reached, reduce heat and simmer 10 minutes.
  11. Remove pan from stove.
  12. Stir in 1/2 cup shredded cheddar cheese.
  13. Let cool, serve, and enjoy!


Loading

Categories
Archaeology Food History Life Links from other sources. Reprints from other.

The world’s oldest bread loaf is more than 8,000 years old.

Views: 22

The world’s oldest bread loaf is more than 8,000 years old.

Bread is such a staple food that it’s often synonymous with sustenance itself, as in “putting bread on the table,” “breadwinner,” or “daily bread.” Indeed, humans have been eating bread for a long, long time. The earliest loaf of bread ever discovered is a whopping 8,600 years old, unearthed at Çatalhöyük, a Neolithic settlement in what is now southern Turkey, comprised of mud-brick dwellings built on top of one another.

While excavating the site, archaeologists found the remains of a large oven, and nearby, a round, organic, spongy residue among some barley, wheat, and pea seeds. After biologists scanned the substance with an electron microscope, they revealed that it was a very small loaf of uncooked bread. It had been fermented, like a sourdough loaf, and someone had pressed their finger in the center of it. The dough had been encased in clay, which allowed it to survive for thousands of years.

The preserved loaf dates back to around 6600 BCE, but by that point, humans had already been baking bread for thousands of years. Some baking even predates agriculture, meaning our prehistoric ancestors were making the food with foraged grains. The oldest known evidence of bread, found in the Black Desert in modern-day Jordan, dates back around 14,000 years. Researchers recovered crumbs from large, circular stone fireplaces — one archaeobotanist compared it to the charred crumbs at the bottom of a toaster. This ancient bread was made of wild wheat and root vegetables, kneaded, then baked on hot stones. The process would have been labor intensive, so archaeologists theorize that bread was a treat reserved for special occasions.


Loading

Categories
Food Recipe

Lemon Raspberry Cake recipe

Views: 16

Source: https://www.thepioneerwoman.com/food-cooking/recipes/a60607895/lemon-raspberry-cake-recipe/

Ingredients:

FOR THE CAKE:

  • Baking spray with flour, for the pans (optional)
  • 2 1/2 c.all-purpose flour
  • 2 tsp.baking powder
  • 1/4 tsp.baking soda
  • 1/4 tsp.kosher salt
  • 1 3/4 c.granulated sugar
  • 8 tbsp.(1 stick) salted butter, melted and cooled slightly
  • 1/2 c.vegetable oil
  • 2 tbsp.lemon zest plus 1/3 c. fresh lemon juice (from 2 to 3 lemons)
  • 3large eggs, at room temperature
  • 3/4 c.buttermilk, at room temperature
  • 2 tsp.vanilla extract

FOR THE JAM FILLING:

  • 1 tbsp.cornstarch
  • 3/4 c.seedless raspberry jam

FOR THE RASPBERRY FROSTING:

  • 1 c.(2 sticks) salted butter, at room temperature
  • 1/3 c.seedless raspberry jam
  • 1 tbsp.fresh lemon juice
  • 1 tsp.vanilla extract
  • 5 c.powdered sugar
  • 1(6-oz.) container raspberries (optional)

Directions:

  1. For the cake: Preheat the oven to 350°F. Spray 2 (8-inch) round cake pans with baking spray with flour. (Alternatively, butter and flour the pans.) Line the bottoms of the pans with parchment paper and spray (or butter) again.
  2. 2In a medium bowl, whisk together the flour, baking powder, baking soda, and salt.
  3. 3In a large bowl, whisk together the granulated sugar, melted butter, vegetable oil, and lemon zest until combined. Whisk in the eggs, one at a time, until lightened in color, about 1 minute. Whisk in the buttermilk, lemon juice, and vanilla. Add the flour mixture in 3 parts, whisking to combine after each addition.
  4. 4Evenly divide the batter between the prepared pans. Tap the pans a few times on a kitchen towel on your countertop to level the surface and remove air bubbles.
  5. 5Bake until a toothpick inserted in the center comes out with only a few crumbs, 30 to 35 minutes. Transfer to a cooling rack. Let cool in the pans for 10 minutes, then turn out onto a cooling rack to cool completely, about 1 1/2 hours.
  6. 6For the jam filling: Meanwhile, in a small bowl, whisk together the cornstarch and 1 tablespoon water. In a small saucepan, heat the jam over medium heat until pourable and smooth, about 1 minute. Remove the jam from the heat and whisk in the cornstarch mixture. Return the saucepan to medium heat and bring the mixture to a boil. Boil, stirring constantly, until no longer cloudy with cornstarch and a rubber spatula dragged through the mixture reveals the bottom of the pan for a few seconds before the jam flows back together, 2 to 3 minutes. Transfer the thickened mixture to a bowl and let it cool completely.
  7. 7For the frosting: To the bowl of a stand mixer fitted with the paddle attachment, add the butter. Beat on medium speed until smooth, about 1 minute. Scrape down the bottom and sides of the bowl. Add the jam, lemon juice, and vanilla, and beat on low speed until just combined, 30 seconds. The mixture might appear broken but that is okay. Increase the speed to medium and beat until the butter and jam are no longer separated, 1 to 2 minutes. Gradually add the powdered sugar, and beat on low speed until combined. Scrape the bottom and sides of the bowl. Increase the speed to medium and beat until smooth and fluffy, 3 to 4 minutes.
  8. 8Place 1 cake layer on a cake plate. Spread about ½ cup of frosting over the top; this will be a barrier to prevent the cake from absorbing the jam filling. Spoon about ½ cup of the frosting into a zip-top bag and cut a ¾-inch opening in one corner. Alternatively, use a pastry bag fitted with a ¾-inch tip. Pipe a thick border around the edge of the frosted cake layer; this will prevent the jam filling from leaking out the sides of the cake.
  9. 9Stir the jam filling to loosen it up. Spread the filling on top of the cake within the frosting border, leaving about ½ inch of space between the filling and the border. Top with the second cake layer.
  10. 10Spread about 1 cup of frosting in a thin layer over the top and sides of the cake. Chill the cake, uncovered, in the refrigerator for 30 minutes or in the freezer for 10 minutes to set the frosting and the filling. Use the remaining frosting to frost the top and sides of the cake.
  11. 11Decorate the cake with the raspberries or serve on the side, if you like.

Loading

Categories
Food Life Recipe Reprints from other.

Huevos Rancheros Casserole.

Views: 11

Huevos Rancheros Casserole.

Make this easy Huevos Rancheros Casserole for a breakfast dish everyone will love! Friends and family alike will marvel at this easy breakfast casserole, which features Mexican-inspired flavors with delicious eggs, cheese, and chorizo. A batch of this baked huevos rancheros will make any morning perfect.

Huevos Rancheros is a classic Mexican egg dish. It’s a hearty, filling, and flavorful dish. Although this is typically a breakfast dish, there’s no reason why this flavorful casserole can’t be served for dinner too!

Our version includes enchilada sauce, corn tortillas, beans, chorizo, eggs, and cheese. All topped with avocado and cilantro. Delish. Follow the recipe below to make this delicious dish!

It’s the Perfect Way to Feed a Crowd!

This casserole is the perfect way to feed a crowd for breakfast or brunch. Why fret over frying eggs, cooking bacon, and flipping pancakes when you can just make one flavor-packed casserole? The ingredients are easy to keep on hand and it’s a breeze to throw together. This flavorful breakfast casserole will become your new go-to breakfast recipe!

Ingredients you will need:

  • 1 large can enchilada sauce
  • Corn tortillas (small)
  • 1 can black beans (drained & rinsed)
  • 2 small cans green chilies
  • 1 lb. pkg. chorizo
  • 4 C. shredded Mexican cheese blend
  • 12 Eggs
  • Green onions, chopped
  • Cilantro, chopped
  • Avocado, sliced
  • Instructions

    • Preheat the oven to 350 degrees. Coat the bottom of a 9″ x 13″ pan with half of the enchilada sauce.
    • Cover the sauce with a layer of small corn tortillas.
    • Spread the black beans on top of the tortilla layer.
    • Spread the green chilies on top of the black bean layer.
    • Cook the chorizo sausage in a skillet over medium heat.
    • Layer the cooked chorizo over the green chilies.
    • Add a layer of shredded cheese on top of the chorizo.
    • Add another layer of small corn tortillas.
    • Top the tortillas with enchilada sauce.
    • Add another layer of shredded cheese.
    • Crack the eggs over the cheese layer. Bake at 350 degrees for 25 minutes.
    • Top with cilantro, green onions, and avocado. Yum!

    Notes

    What is Chorizo? Chorizo is a type of spicy sausage that’s popular in Mexican and Spanish cuisines. Chorizo is made from ground pork that has been seasoned with paprkia, chili peppers, and vinegar. It’s commonly used in tacos, burritos, and egg dishes. If you can’t find chorizo in your grocery store, you can make your own homemade version by combining 1 pound ground pork, 2 T. chili powder, 2 T. paprika, 1 tsp. cumin, 1 clove minced garlic, and 1/4 C. apple cider vinegar.

Loading

Categories
Archaeology Food Links from other sources.

250-Year-Old Cherries Found at George Washington’s Mount Vernon Estate.

Views: 274

250-Year-Old Cherries Found at George Washington’s Mount Vernon Estate. 

Archaeologists found something incredibly rare in the cellar of George Washington’s home at Mount Vernon: Two intact jars of cherries buried in the basement of the first U.S. president’s house.

The story of a young George Washington chopping down a cherry tree may be a myth, but the first U.S. president did likely dine on cherries at Mount Vernon, as evidenced by a recent discovery. Archeologists came upon two intact bottles of cherries that had been buried beneath a brick floor at the Virginia estate.

Principal archaeologist Jason Boroughs called the preserved fruit an “extraordinary” find. “They’re plump, they have flesh, they have pits and stems,” he told USA Today“They don’t look as if they’ve been sitting in a bottle for 250 years, although they have.”

According to a press release from Mount Vernon, the liquid still even smelled of cherry blossoms. The European-manufactured jugs were likely produced in the mid-18th century and ended up buried when the brick floor was laid in the 1770s.

Loading

Categories
Food Links from other sources. Recipe

Chicken Strip Pizza Recipe | Easy Chicken Garlic Bread Pizza.

Views: 255

Chicken Strip Pizza Recipe | Easy Chicken Garlic Bread Pizza.

Make this chicken strip pizza for an easy meal everyone will love! This easy recipe combines garlic bread, chicken strips, and pizza, three favorites that features delicious chicken strips and pizza sauce topped with Parmesan cheese.

It’s a cinch to make, and tastes absolutely delicious. Give it a try. It’ll instantly become one of your all-time favorite chicken pizza recipes!

  • In addition, marinara sauce can be substituted for the pizza sauce. You might want a little extra for dipping!
Prep Time 4minutes 
Cook Time 18minutes 
Total Time 22minutes 
Servings: 6

Ingredients

  • 5 to 6 pcs. breaded chicken strips, thawed
  • 1 pkg. frozen garlic bread loaf, sliced
  • 3/4 C. pizza sauce
  • 1 1/2 C. shredded Italian cheese blend

Instructions

  • Preheat oven to 400 degrees. Cut 5 to 6 thawed breaded chicken strips into half-inch pieces.
  • Cut 1 loaf of frozen garlic bread into thirds and bake butter side up for 8 to 9 minutes.
  • Remove from oven and spread 3/4’s cup pizza sauce on top of bread.
  • Cover bread with chicken pieces.
  • Sprinkle with 1 1/2 cups shredded Italian cheese. Bake for 8 to 10 minutes.

Loading

Categories
Food Life Pictures Travel

Tuesday is daytrip day to Amish Country.

Views: 163

Tuesday is daytrip day to Amish Country. With that comes grocery shopping at the Amish Salvage stores and a stop at a Swiss cheese factory and dinner at Mary Yoders. Below are the groceries we bought two weeks ago. Our Trunk after the first stop.

Forty miles outside of Cleveland, Ohio, Geauga County has been a hub for Amish settlements since the 1880s – boasting the fourth-largest Amish population in the world. It’s also home to some of the rarest genetic diseases in the world.

Now stop number two.

And our trunk after stop number three.

And a stop at Mary Yoders for their stuffed cabbage, bread rolls, and mashed potatoes. for only $9.99. Tuesday special.

Tuesday Special.

Loading

Categories
Food Life Recipe Reprints from other.

Perfect and Easy Apple Crisp.

Views: 16

Perfect and Easy Apple Crisp.

This recipe for apple crisp is adapted from a classic 50-year-old recipe. It works best with fresh, crisp cooking apples.

Many of the Amish Restaurants we go to feature the Apple Crisp. This is one delicious dessert.

Ingredients

  • 2 ½ cups apples – peeled, cored, and sliced
  • 1 cup sifted all-purpose flour
  • 1 cup white sugar
  • ½ teaspoon ground cinnamon
  • ¼ teaspoon salt
  • ½ cup butter, softened

Directions

  1. Preheat the oven to 375 degrees F (190 degrees C). Lightly grease an 8-inch square baking dish.

  2. Arrange apple slices evenly in the prepared baking dish. Sift flour, sugar, cinnamon, and salt into a bowl. Cut in butter using a pastry blender, or 2 knives, until mixture resembles coarse cornmeal; sprinkle over apples.

  3. Bake in the preheated oven until topping is golden, 40 to 45 minutes. Cool slightly before serving.

  4. The butter should be gently cut into the flour so it remains in small lumps. This will result in a light, crunchy topping.

Loading

Categories
Food Life Recipe Reprints from other. Uncategorized

Arkansas Green Beans Recipe.

Views: 10

Arkansas Green Beans Recipe.

Ditch your ordinary green bean recipes and try this incredible Arkansas Green Beans recipe instead! Featuring bacon and a savory sauce, this dish takes an old classic to a new level. It’s the perfect recipe for potlucks, holidays, parties, or family dinner! It’s sure to become your new go-to side dish.

Prep Time10 minutes 
Cook Time30 minutes 
Total Time40 minutes 
Course: Side Dish
Cuisine: American


Servings: 10

Ingredients

  • 5 (15 oz.) cans green beans, drained or 4 (16 oz.) bags frozen
  • 12 slices bacon fried and chopped
  • 2/3 C. brown sugar
  • 1/4 C. butter melted
  • 7 t. soy sauce
  • 1 1/2 t. garlic powder

Instructions

  • Preheat oven to 350°. Layer the green beans and bacon on the bottom of a 9″ x 13″ baking dish.
  • Mix together the brown sugar, butter, soy sauce, and garlic powder. Stir well.
  • Pour the brown sugar mixture over the bacon and green beans. Bake for 30 minutes at 350°. Alternatively, you can cook this in a slow cooker set to low heat for 5 to 6 hours.
  • Serve with a slotted spoon and enjoy!

Notes

Tip: Not a fan of canned green beans? No problem! Easily substitute 4 (16 oz.) bags of frozen green beans.

Loading

Categories
Food Life Links from other sources. Recipe

Roasted Garlic Asparagus.

Views: 9

Roasted Garlic Asparagus.
Make this incredible roasted garlic asparagus to perfectly complement your favorite meat. Cooked to perfection and featuring an amazing garlic flavor, it’s unbeatable when paired with steak, chicken, fish, pork, or any other protein! Use the written instructions or video below to learn how to make the best asparagus around. Your whole family will love it!

Ingredients

  • 1/2 C. extra virgin olive oil
  • 8 garlic cloves, minced
  • 1 t. onion powder
  • 1 T. parsley, chopped
  • 2 lbs. thin asparagus, ends trimmed
  • Sea salt
  • Black pepper

Instructions

  • Line a large baking pan with parchment paper and set aside.
  • In a saucepan, add olive oil, garlic, onion powder, and parsley.
  • Cook for 3 minutes on medium-low heat, being careful not to brown the mixture.
  • Trim the ends from asparagus.
  • Place asparagus in the prepared pan and sprinkle with sea salt and black pepper.
  • Drizzle on the olive oil mixture. Roast in a preheated 400° oven for 8 to 10 minutes.
  • Serve and enjoy!

Loading

Categories
Food Life Recipe Uncategorized

Cheddar Broccoli Casserole Recipe | Cheesy Casserole.

Views: 14

Cheddar Broccoli Casserole Recipe | Cheesy Casserole.

Looking for a great potluck dish, or just a side that your whole family will love? With the broccoli-cheddar casserole, you’ve found it! This amazing recipe is cheesy, crunchy, and, above all, delicious!

Prep Time10 minutes 
Cook Time35 minutes 
Total Time45 minutes 

Ingredients

  • 2 (10 oz.) pkgs. frozen chopped broccoli, cooked and drained
  • 1 cup mayonnaise
  • 1 cup sharp cheddar cheese, shredded
  • 1 (10.7 oz.) can cream of mushroom soup
  • 2 eggs, lightly beaten
  • 2 cup butter-flavored crackers, crushed
  • 2 tablespoons butter, melted

Instructions

  • Place 2 (10 oz.) packages frozen chopped broccoli, cooked and drained, in a mixing bowl.
  • Add 1 cup mayonnaise.
  • Add 1 cup shredded cheddar cheese.
  • Add 1 (10.7 oz) can cream of mushroom soup.
  • Put 2 lightly-beaten eggs into bowl.
  • Stir ingredients.
  • Mix until thoroughly combined.
  • Spread mixture evenly across bottom of 9 x 13″ pan.
  • Sprinkle the crumbled crackers over the mixture and drizzle with 2 tablespoons of melted butter.
  • Place in preheated 350 degree oven for 35 minutes or until golden brown.
  • Remove from oven. Serve hot and enjoy!

Loading

Categories
Food Life Links from other sources. Recipe

Homemade Pizza Crust | Make your Own Pizza Crust.

Views: 16

Homemade Pizza Crust | Make your Own Pizza Crust.

It’s easier than you think to make homemade pizza dough! So skip the truly “cardboard” pizza the next time you’re at the grocery store and grab the good old fixings instead. In this post, we’ll tell you what you need to know to make made from scratch pizza crust.

Made-from-Scratch Pizza Dough

It’s easier than you think to make homemade pizza dough! So skip the truly “cardboard” pizza the next time you’re at the grocery store and grab the good old fixings instead. In this post, we’ll tell you what you need to know to make made from scratch pizza crust.

Ingredients

  • 1 C. hot water
  • 1 packet of quick rise yeast 1/4 ounce
  • 2 C. all purpose flour
  • 1 t. salt
  • 1 T. olive oil

Instructions

  • Mix hot water and yeast together in a small bowl. Set aside for five minutes.
  • Mix together the flour and salt in a medium bowl.
  • Gradually add the yeast and flour mixture to the flour and salt.
  • Add the olive oil and stir with a fork.
  • When well blended, place dough ball on a floured surface.
  • Knead dough and gradually add flour as needed until it is no longer sticky. Knead dough for 5-10 minutes or until the dough is smooth and pliable.
  • Roll dough out on oiled pizza pan or stoneware baking pan.
  • Bake in 450 degree oven for 5-10 minutes or until crust is just staring to brown. Remove from oven and add your favorite pizza sauce and toppings.
  • Ready for toppings.

Loading

Categories
Food Links from other sources. Recipe Reprints from other.

Almond Cookie Bars with Coconut.

Views: 20

Almond Cookie Bars with Coconut.

HOW TO MAKE COOKIE BARS WITH ALMOND FLOUR

This buttery cookie is made much like shortbread. Except we are using almond flour instead of all-purpose flour. Bob’s Red Mill Super-Fine Almond Flour is my favorite {not sponsored, just a big fan}.

Baking with almond flour is very common in gluten free baking. You use it much like regular flour, but the two can’t usually be swapped for one another without making additional recipe changes. Almond flour is made of finely ground almonds so it reacts differently from regular flour made of wheat.

a look at the chewy inside texture of almond cookie bars

Remember to pin this recipe to Pinterest! Use the button on the recipe card or the share buttons on the side or bottom of this page.

INGREDIENTS FOR THIS GLUTEN FREE RECIPE

ingredients for almond cookie bars with coconut
  • Almond flour ~ I used Bob’s Red Mill Super-Fine Almond Flour
  • Confectioners’ sugar ~ adds softness and some sweetness
  • Kosher salt ~ if using table salt, use a little less
  • Coconut ~ use flaked or shredded, the kind that looks like shredded cheese. If you don’t want long strands in the cookie bars, give it a little chop before adding to the recipe.
  • Unsalted butter ~ because this is a shortbread like base, I recommend a good quality European butter such as Plugra or Kerrygold.
  • Chocolate ~ I used a chopped milk chocolate bar {I always have Trader Joe’s Pound Plus bars in my baking cabinet}, but you could use chocolate chips and dark chocolate, if preferred.
  • Almonds ~ dry roasted almonds were chopped for the topping, but you could also use sliced or slivered almonds.
HOW TO MAKE ALMOND COOKIE BARS WITH COCONUT AND CHOCOLATE

Start by preparing an 8×8 baking pan with parchment paper. This is the USA Pan that I use and love.

Then add the almond flour, confectioners’ sugar, coconut and kosher salt in a bowl and mix to combine. I use my pastry cutter for this {less dishes to wash!}. Next add the unsalted butter and use a pastry cutter or fork to cut the butter into the dry ingredients until a soft dough forms.

Now press the cookie dough evenly into the prepared baking pan. Bake for 12 minutes, until the edges are set and lightly browned. Remember your oven is different than mine and our baking times might be slightly different.

unbaked buttery almond flour base in baking pan

When the cookie is baked, remove it from the oven and immediately sprinkle the chocolate over the hot bars. Allow it to sit for three minutes, then use an off-set spatula to smooth the melted chocolate over the almond cookie.

Sprinkle coconut and chopped almonds over the top of the melted chocolate. Then use clean hands to lightly press the coconut and almonds in to the melted chocolate.

Now comes the hard part, waiting for them to cool! It takes about an hour for the cookies to be cool enough to slice them into bars without them falling apart. You can speed this process up by placing the pan in the refrigerator once it is cool enough to handle with bare hands.

overhead look at cut cookie bars on a parchment lined cutting board

WHY YOU WILL LOVE THIS COOKIE BAR RECIPE

  • It’s EASY! Active time is 10-15 minutes.
  • No chill time.
  • Uses cold butter.
  • Creates soft and chewy almond cookie bars, with almond joy like flavors.
  • A great cookie bar for those needing a dessert without flour.
cookie bars with a bite out of it and bowl of coconut in the background
Just look at that soft and chewy texture!

Loading

Categories
Food Links from other sources. Recipe

Classic One-Pot Pasta. Made the Amish way.

Views: 30

Classic One-Pot Pasta. Made the Amish way.

This pasta dish doesn’t have to be made with spaghetti, you can use rotini, penne pasta, or noodles. Sprinkle parmesan cheese over the spaghetti and it is delicious. Leftovers of this supper can be stored in an airtight container and put in the fridge. Out of all the one-pot pasta recipes I’ve tried this is one of the best and most flavorful.

Pasta is often seen as an Italian creation and perhaps it is, but the Amish have definitely embraced homemade pasta – especially noodles – as their own. Most noodles just take eggs, flour, and salt and some patience and you have a delicious dish.

Their diet revolves around self-sufficiency and locally-grown foods. They often make their own egg noodles, which are similar to pasta, and sometimes even other types like ravioli or lasagna.

INGREDIENTS.
  • 12 ounces spaghetti or homemade egg noodles
  • 6-8 tablespoons olive oil
  • medium onions, chopped
  • medium carrots, very finely chopped or grated
  • about 4 garlic cloves
  • cups home-canned chopped tomatoes with liquid or use store-bought
  • Tbsp tomato puree
  • 2 teaspoons sugar
  • 6 cups vegetable broth
  • parsley, basil, oregano, thyme, allspice (to taste) salt, pepper
INSTRUCTIONS.
  • In a pot, heat the oil and saute onion until translucent.
  • Add carrots and garlic and saute for 1 more minute.
  • Add chopped tomatoes, tomato puree, sugar, spices   about 4 cups broth. Bring to boil and cook for about 15 minutes.
  • Add spaghetti and simmer until the pasta is   about 15 minutes. Stir from time In a pot, heat the oil and saute onion until translucent.
  • Add carrots and garlic and saute for 1 more minute.

Loading


Bauherrenhaftpflicht Rechner

page counter
16Shares